Communicating with Brain Products Devices
This guide will talk you through how to use send triggers (event markers) from PsychoPy, via serial communication, to Brain Products’ BrainVision Analyzer. We’re assuming here that you’re sending a trigger to mark the onset of a visual stimulus, but you can easily adapt the logic of when the trigger is sent, to mark other events too.
If you’d like to interface Brain Products’ Remote Control Server 2 (RCS) from PsychoPy you can find out how to do that in this article
If you are using Brain Products with a TriggerBox you can download an example experiment here
You can also find guidance on how to send LabStreaming Layer markers in this article from the BCI blog
Step one: Add code components into your Builder experiment
To communicate with Brain Products devices, you’ll need to add in some Python code components to your experiment.
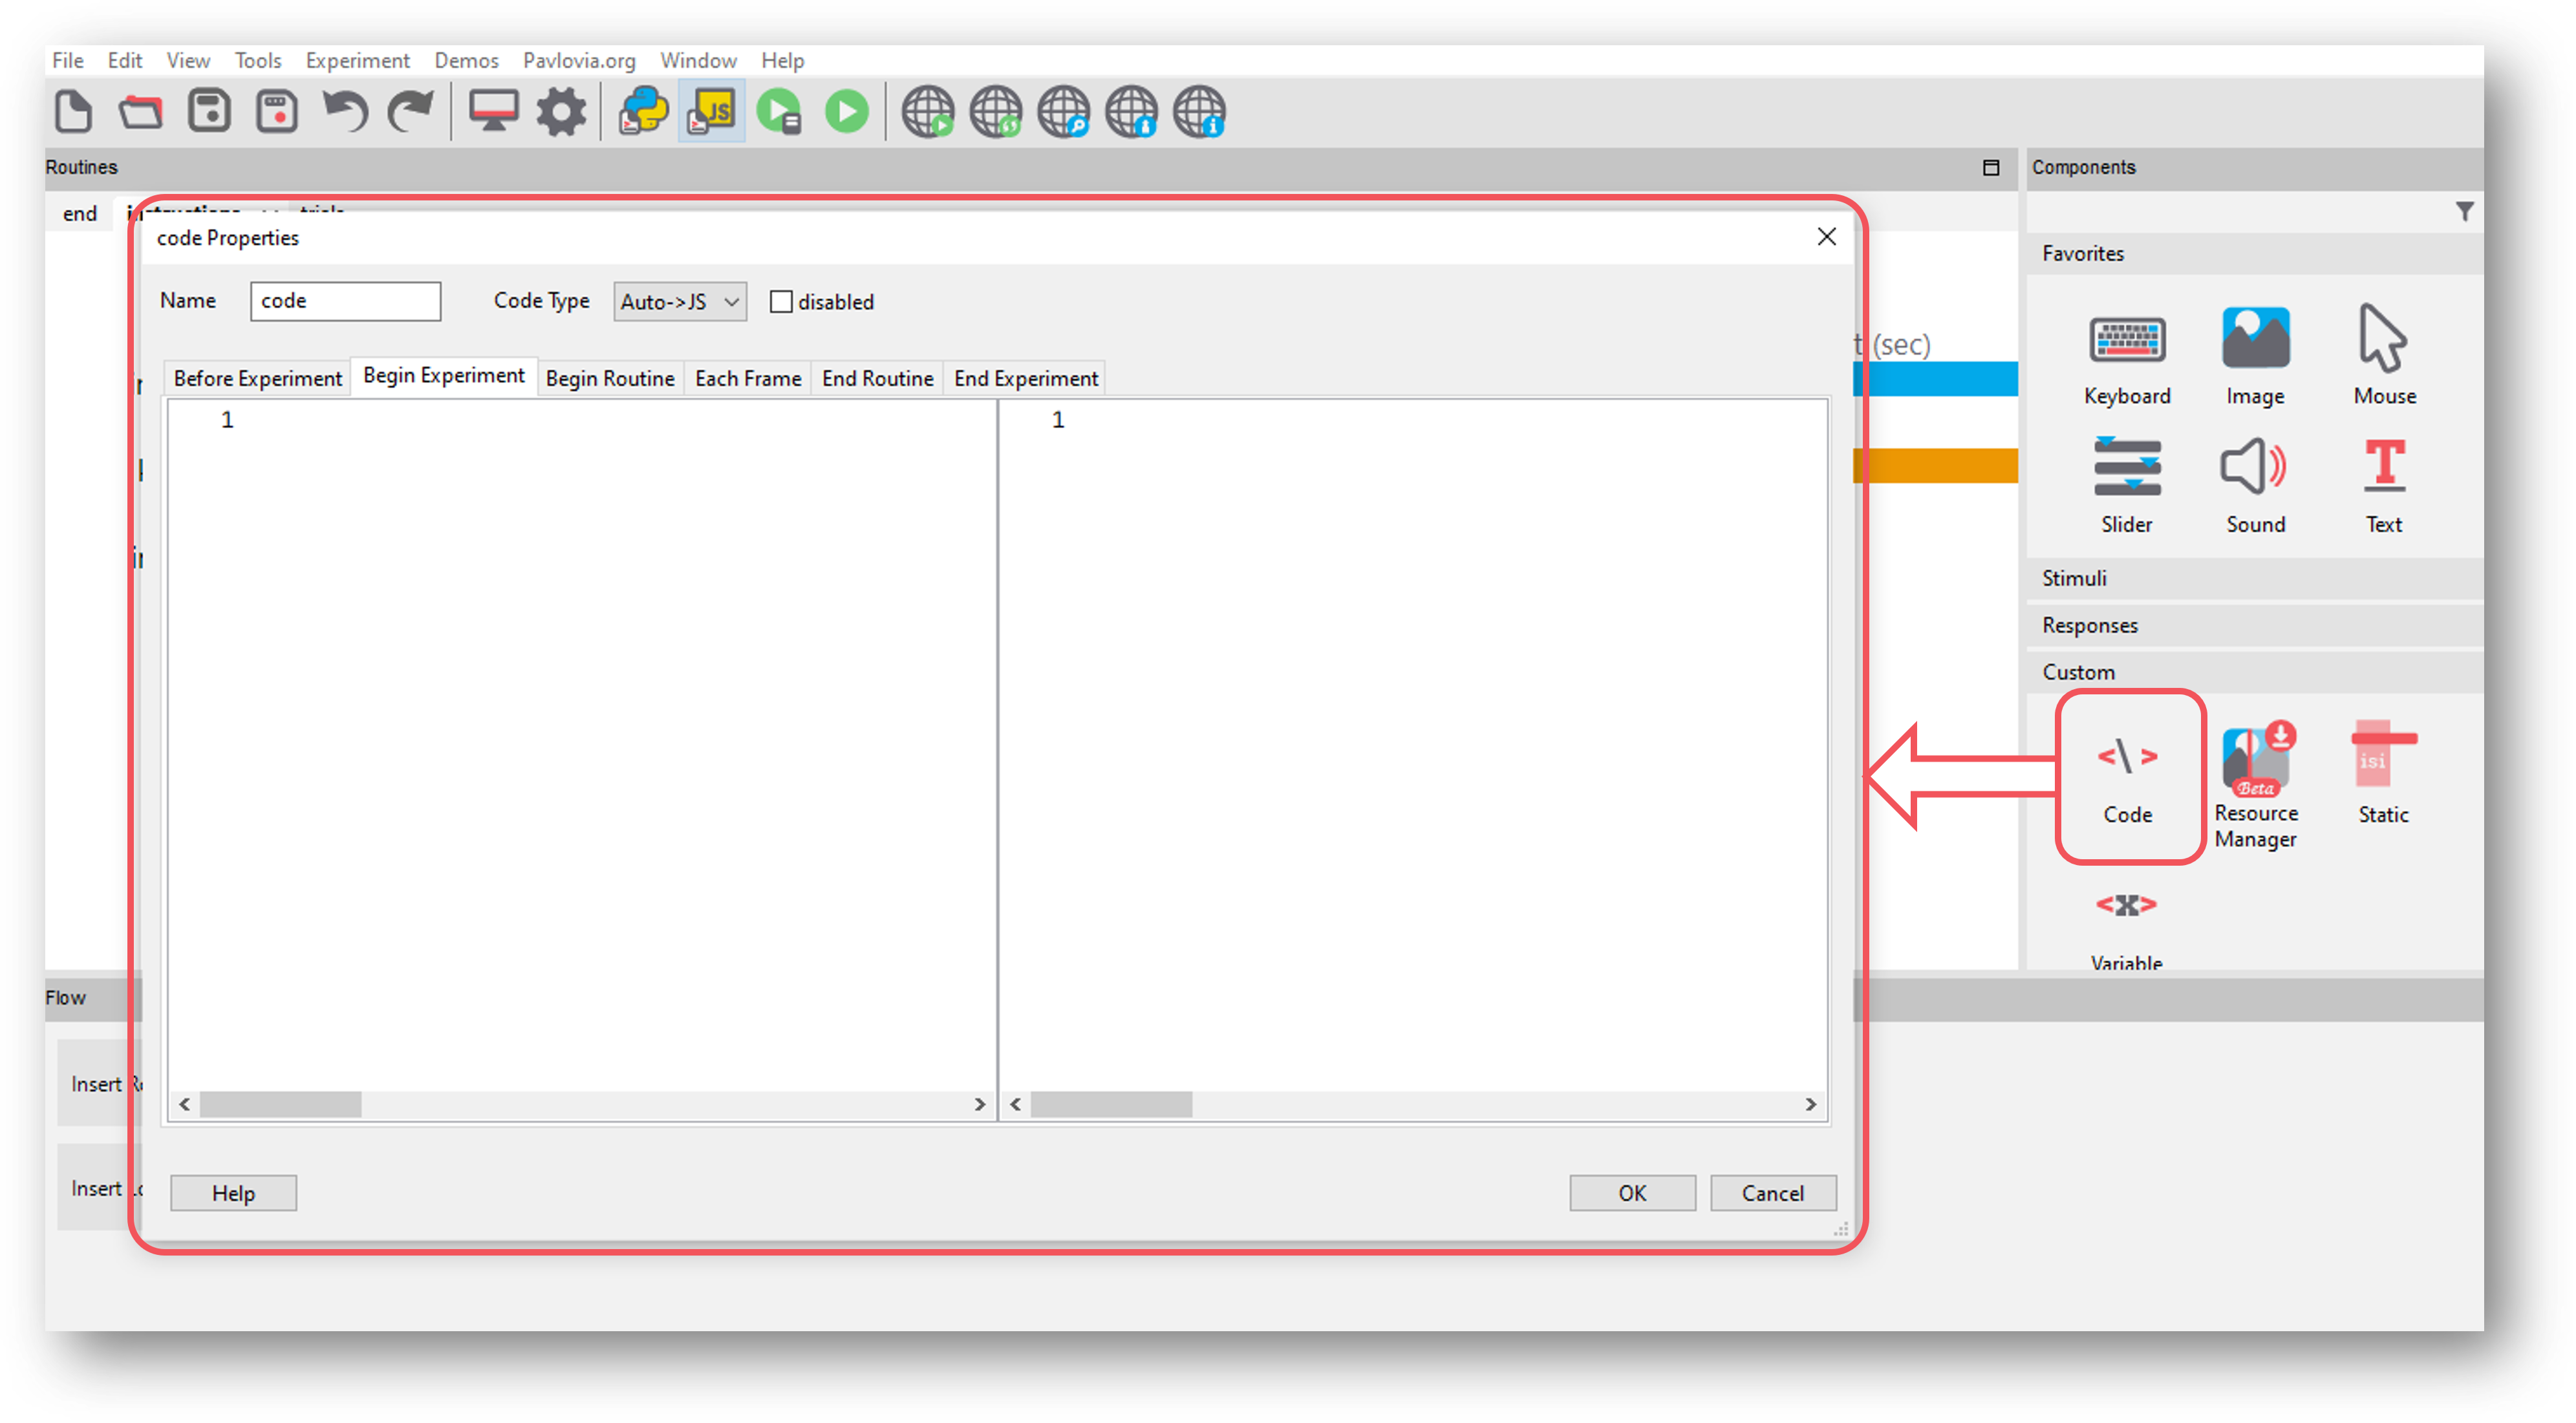
First, add in a code component to your Instructions routine (or something similar, at the start of your experiment):

Fig. 40 Select the Code component from the Custom component drop-down
In the Begin Experiment tab, copy and paste the following code which will import the relevant libraries and set up the communication with your Brain Products device:
# Import modules needed
import serial

# Define the send_triggers function to send trigger
# to serial port
def send_triggers(value):
    """Send value as hardware trigger"""
    port.write(value)

# Define serial port to be used
port = serial.Serial("COM3") ##CHANGE THIS TO THE ADDRESS OF YOUR SERIAL PORT
Now, copy and paste the following code component to your trial routine in the Begin Routine tab, this just (re)sets a value at the start of the routine to indicate that no trigger has yet been sent:
#Mark the stimulus onset triggers as "not sent"
#at the start of the trial
stimulus_pulse_started = False
stimulus_pulse_ended = False
Now, in the Each Frame tab of that same code component, add the following code to send a trigger when your stimulus is presented. The
.statusattribute here is checking whether the our stimulus has started, and if it has, PsychoPy sends the trigger. Note that most components in PsychoPy have the.statusattribute, so you could easily adapt this code to send triggers on the onset of other components.:##STIMULUS TRIGGERS## #Check to see if the stimulus is presented this frame #and send the trigger if it is if stimulus.status == STARTED and not stimulus_pulse_started: #If the stimulus component has started and the trigger has not yet been sent. Change 'stimulus' to match the name of the component you want the trigger to be sent at the same time as win.callOnFlip(send_triggers, [0,0,0,0,0,0,0,1])#Send the trigger, synced to the screen refresh stimulus_pulse_start_time = globalClock.getTime() stimulus_pulse_started = True #The trigger has now been sent, so we set this to true to avoid a trigger being sent on each frame #If it's time to end the pulse, reset the value to "0" #so that we don't continue sending triggers on every frame if stimulus_pulse_started and not stimulus_pulse_ended: if globalClock.getTime() - stimulus_pulse_start_time >= 0.005: win.callOnFlip(send_triggers, [0,0,0,0,0,0,0,0]) stimulus_pulse_ended = True
Finally, in a routine at the end of your experiment (the Thanks for participating screen for example) copy and paste the following:
#Close the connection to the serial port
port.close()
Step four: Test your triggers
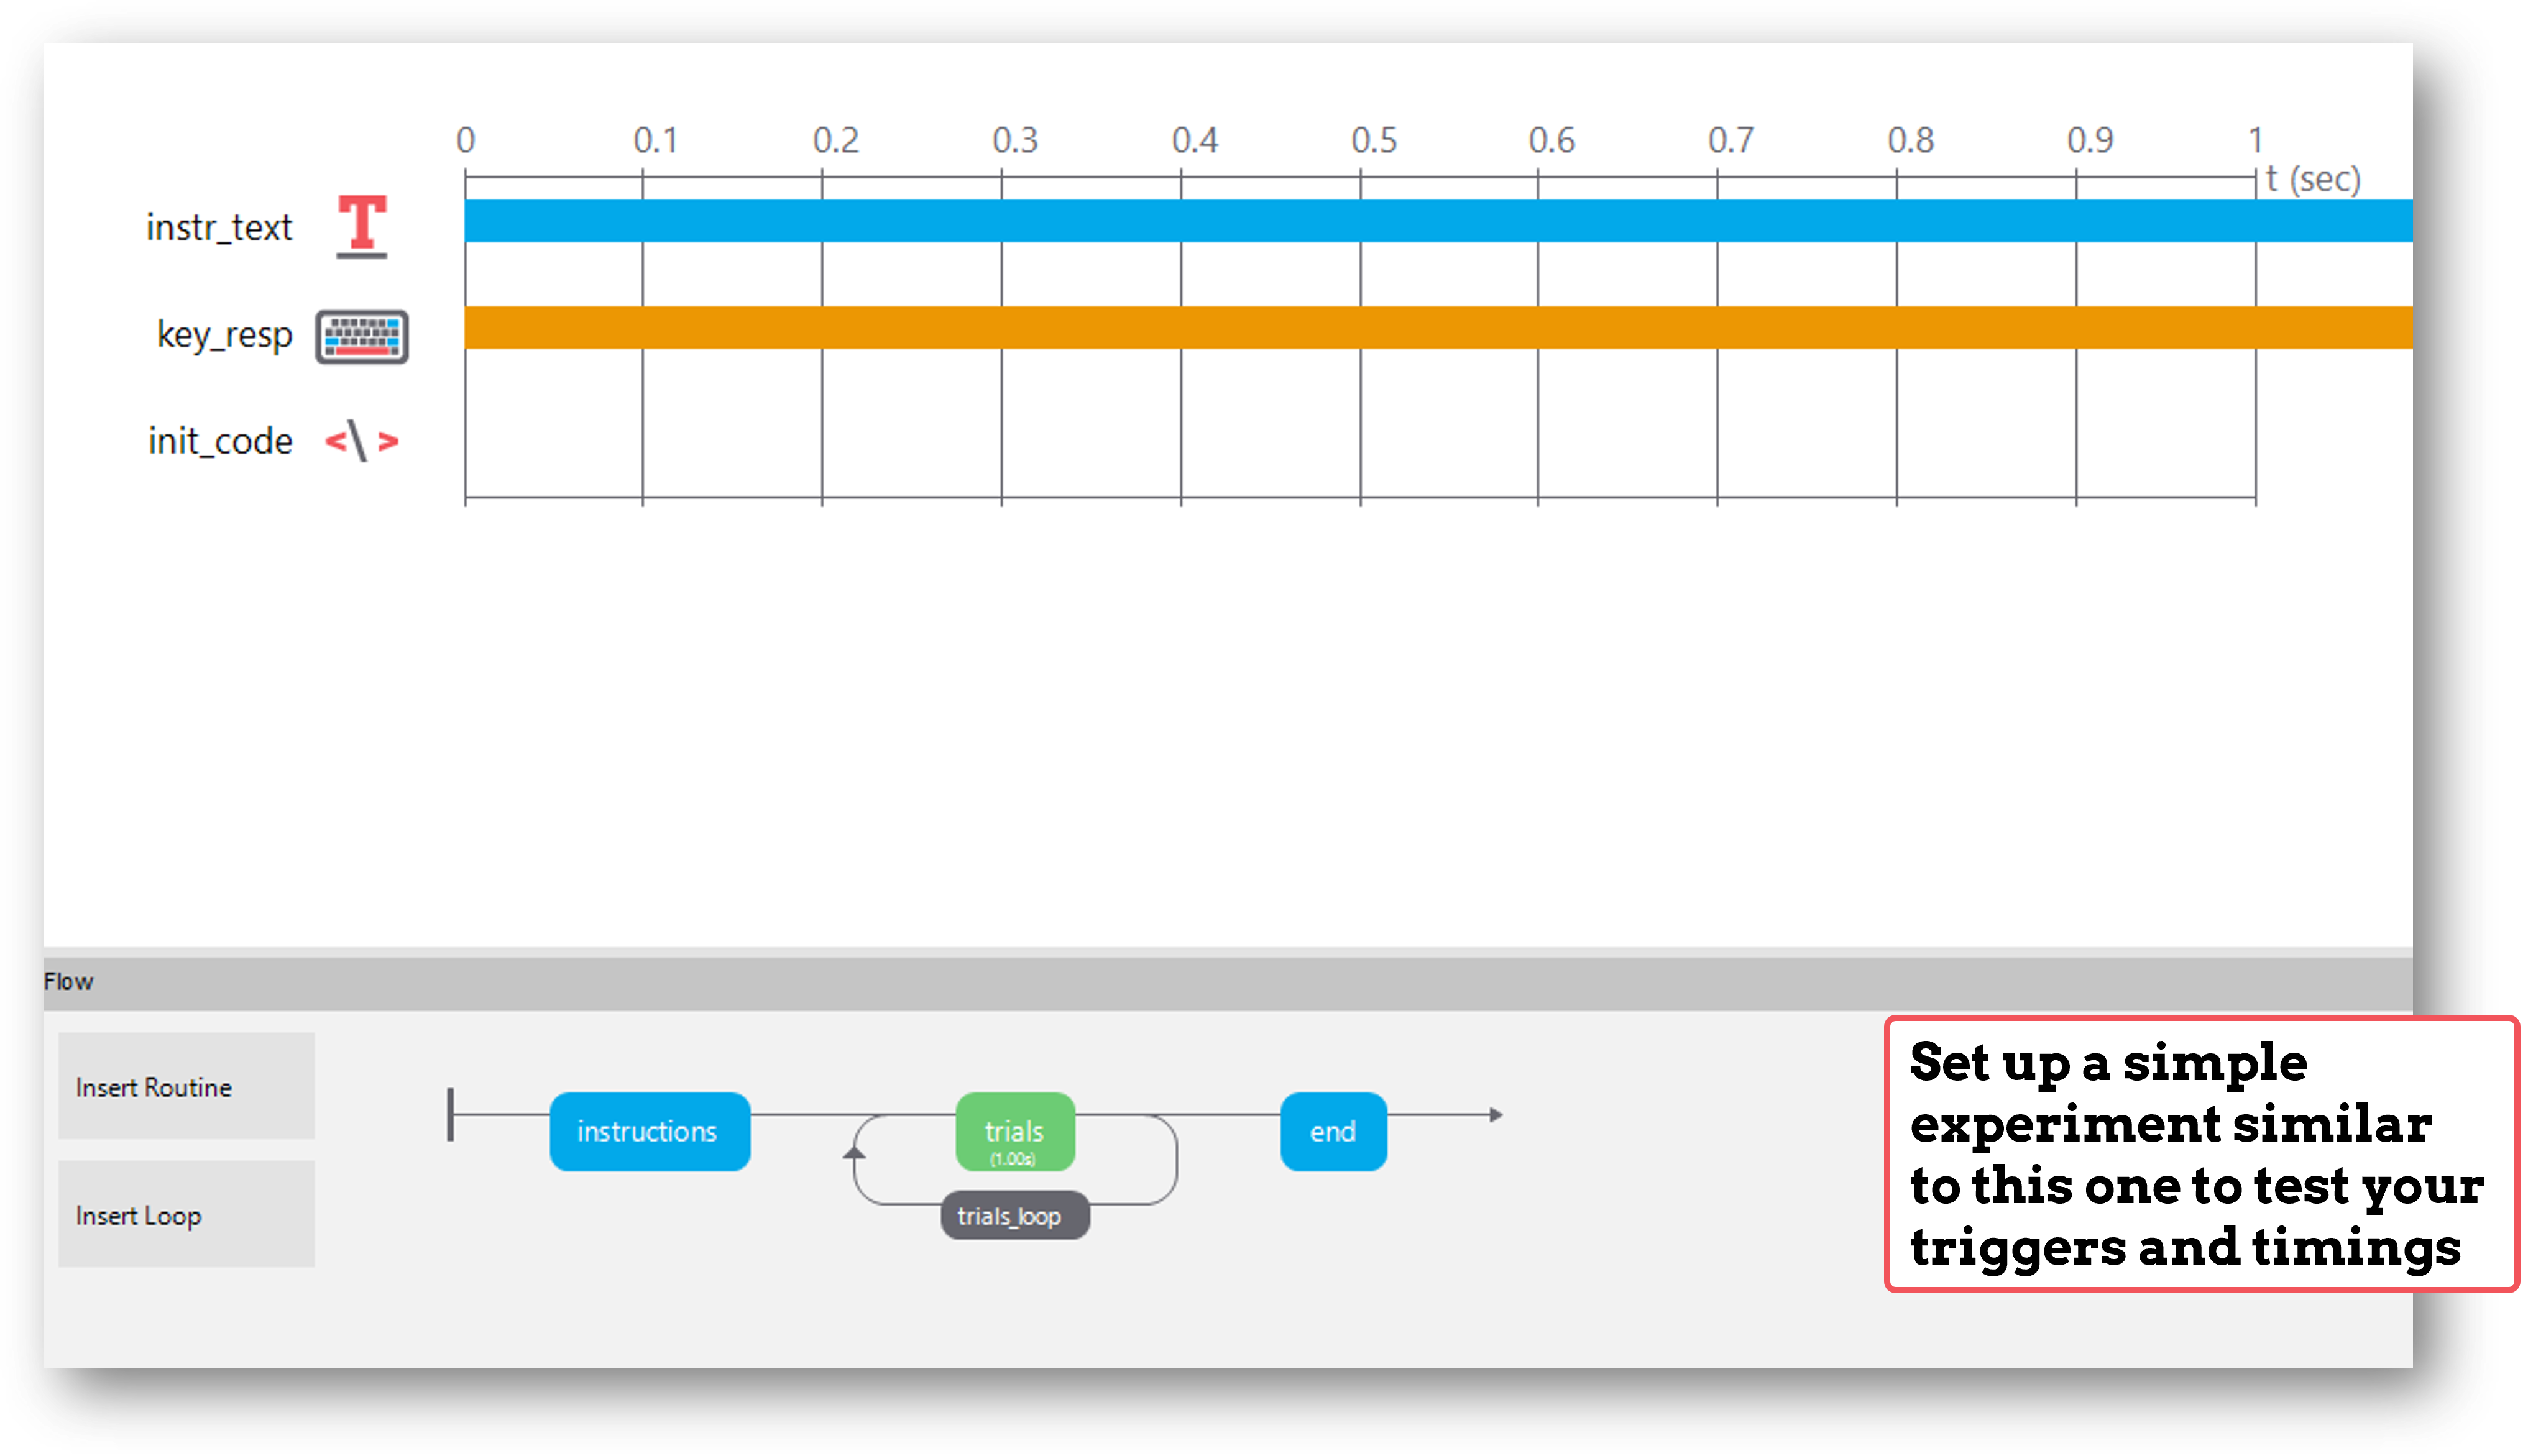
To check that everything works, we recommend that you set up a very basic experiment that looks similar to this:

Turn on your EEG recording device and start recording as you would in your actual experiment, and just check that you see triggers coming through.
It’s a good idea at this point to also check the timing of your stimulus presentation and your triggers using, for example, a photodiode for visual stimuli.
Doing these checks with a very basic experiment just means that you don’t accidentally change something on your real experiment file that you don’t want to, and also means you don’t have to disable components or sit through lots of instructions etc!
If there is a problem - We want to know!
If you have followed the steps above and are having an issue with triggers, please post details of this on the PsychoPy Forum.
We are constantly looking to update our documentation so that it’s easy for you to use PsychoPy in the way that you want to. Posting in our forum allows us to see what issues users are having, offer solutions, and to update our documentation to hopefully prevent those issues from occurring again!

