Builder concepts
Routines and Flow
The Builder view of the PsychoPy® application is designed to allow the rapid development of a wide range of experiments for experimental psychology and cognitive neuroscience experiments.
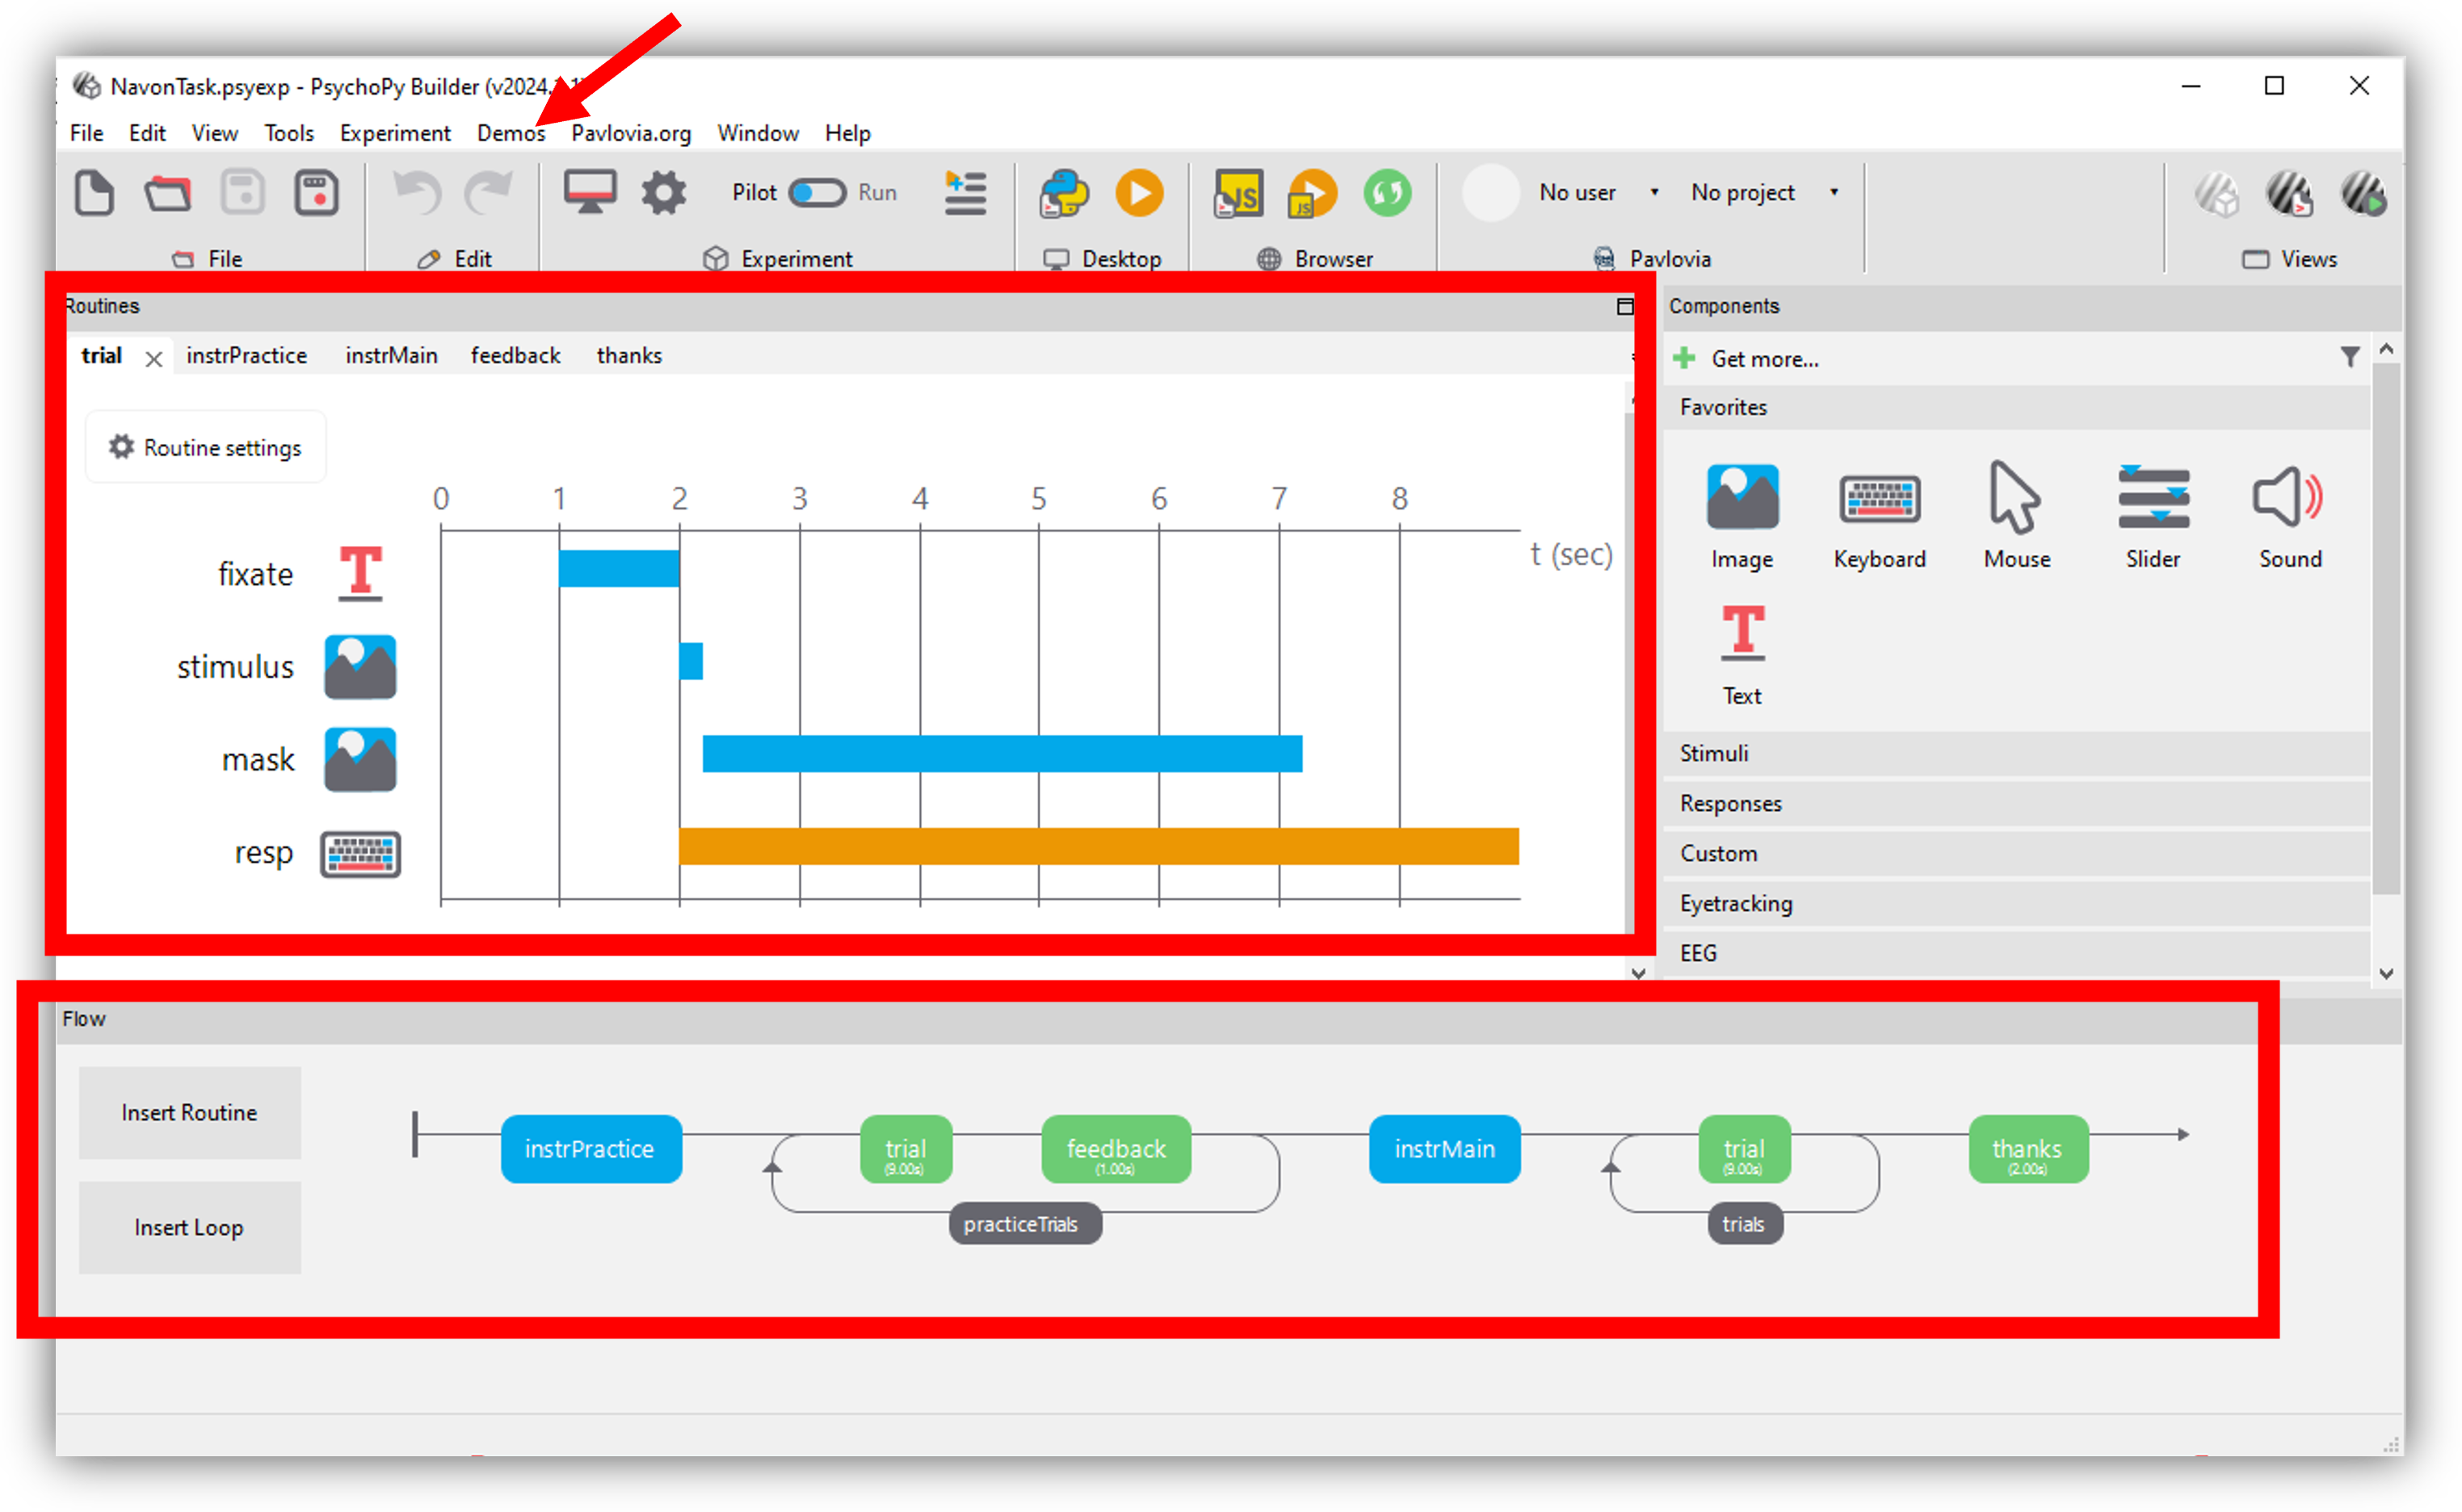
The Builder view comprises two main panels for viewing the experiment’s Routines (upper left) and another for viewing the Flow (lower part of the window).
An experiment can have any number of Routines, describing the timing of stimuli, instructions and responses. These are portrayed in a simple track-based view, similar to that of video-editing software, which allows stimuli to come on go off repeatedly and to overlap with each other.
The way in which these Routines are combined and/or repeated is controlled by the Flow panel. All experiments have exactly one Flow. This takes the form of a standard flowchart allowing a sequence of routines to occur one after another, and for loops to be inserted around one or more of the Routines. The loop also controls variables that change between repetitions, such as stimulus attributes.
If it is your first time opening PsychoPy®, we highly recommend taking a look at the large number of inbuilt demos that come with PsychoPy®. This can be done through selecting Demos > unpack demos within your application. Another good place to get started is to take a look at the many openly available demos at pavlovia.org you can view an intro to Pavlovia at our Youtube channel.

The |PsychoPy| builder, the Routines panel an the Flow are highlighted, if you are new to |PsychoPy|, we recommend starting by unpacking your demos and exploring the example tasks
The components panel
You can add components to an experiment by selecting components from the Components panel. This is currently divided into 7 sections:
Favorites - your commonly used components
Stimuli - components used to present a stimulus (e.g. a visual image or shape, or an auditory tone or file)
Responses - stimulu used to gather responses (e.g. keyboards or mouse components - amongst many others!)
Custom - builder can be used to make a fair few complex experiments now, but for added flexibility, you can add code components at any point in an experiment (e.g. for providing response-dependant feedback).
EEG - PsychoPy® can actually be used with a range of EEG devices. Most of these are interacted with through delivering a trigger through the parallel port (see I/O below), or serial port (see ../api/serial.html). However, PsychoPy® Builder has inbuilt support (i.e. no need for code snippets) for working with Emotiv EEG, you can view a Youtube tutorial on how to use Emotiv EEG with PsychoPy here.
Eyetracking - PsychoPy® 2021.2 released inbuilt supprort for eyetrackers! PsychoPy® had supported eye tracker research for a while, but not via components in PsychoPy® builder. You can learn more about these from the more specific components.html info.
I/O - I/O stands for “input/output” under the hood this is ../api/iohub.html, this is useful for if you are working with external hardware devices requiring communication via the parallel port (e.g. EEG).
Making experiments to go online

Buttons to interact with pavlovia.org from your experiment builder
Before making an experiment to go online, it is a good idea to check the status of online options - remember PsychoJS (the javascript sister library of PsychoPy®) is younger that PsychoPy® - so not everything can be done online yet! but for most components there are prototype work arounds to still make things possible (e.e. RDKs and staircases). You can learn more about taking experiments online from builder via the online documentation.

